 Metal Visiting Cards
 Merry Christmas Gift
How to design Visiting Card in CorelDraw
Designing a clean, print-ready visiting card in CorelDRAW is easier than you think. In this guide, you’ll set correct sizes, bleed and margins, layout text and logos, and export a perfect PDF for your printer.
Before You Start (Print Specs You Should Use)

-
Final Size (choose one commonly used in India):
-
90 × 54 mm (approx. 3.54 × 2.13 in), or
-
89 × 51 mm (3.5 × 2 in)
-
-
Bleed: 3 mm (0.125 in) on all sides
-
Safe Margin: 3 mm inside the final edge
-
Resolution: 300 DPI for any placed images
-
Color Mode: CMYK (for professional printing)
-
Minimum font size: 7–8 pt for small text (email, URL)
-
Line weight: ≥ 0.25 pt for thin rules
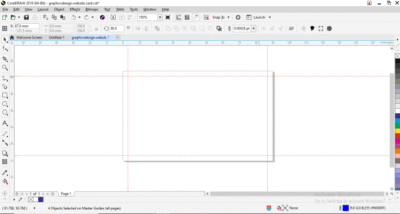
Step 1: Create a New Document
-
 File ▸ New
 -
Primary color mode: CMYK
-
Page size: set to your final size (e.g., 90 × 54 mm).
-
If your CorelDRAW version supports it, set Bleed = 3 mm. If not, we’ll add it manually in Step 3.
 File ▸ New
Pro tip: Name the file like VisitingCard_ClientName.cdr so you stay organized.
Step 2: Turn On Helpers (Rulers, Guidelines, Snapping)
-
View ▸ Rulers (on)
-
View ▸ Guidelines (on)
-
View ▸ Snap To ▸ Objects (on) for clean alignment
Step 3: Build Bleed & Safe-Area Rectangles
We’ll create two rectangles to work faster than fiddling with settings.
-
Draw a rectangle (press F6), select it, then press P to center to page.
-
With the rectangle selected, set its size to final size (e.g., 90 × 54 mm). This is your trim area.
-
Duplicate it (Ctrl + D).
-
Enlarge the duplicate by +6 mm in both width and height (that’s 3 mm bleed on each side). This is your bleed frame.
-
-
Duplicate the original trim rectangle again.
-
Shrink this copy by −6 mm in both width and height. This is your safe area.
-
-
Give each rectangle a different outline color (no fill) so you can see them:
-
Outer (Bleed) – keep background elements extending to this edge.
-
Middle (Trim) – final card edge/crop area.
-
Inner (Safe) – keep all text/logos inside this.
-
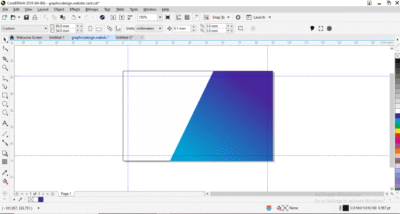
Step 4: Create the Background (With PowerClip for Perfect Bleeds)
-
Draw a big background shape or import a background image.
-
Make sure it’s larger than the trim and fully covers the bleed.
-
Select the background, then Object ▸ PowerClip ▸ Place Inside Frame, and click the outer bleed rectangle.
-
To edit inside, hold Ctrl while clicking the PowerClip or use Object ▸ PowerClip ▸ Edit.
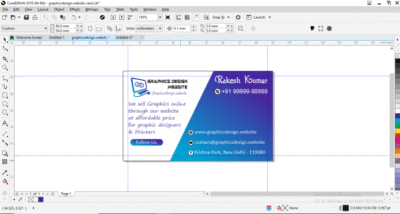
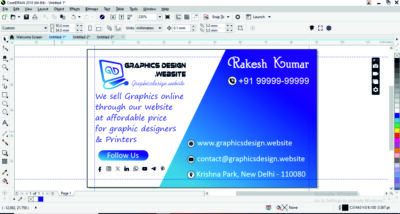
Step 5: Place Your Logo the Smart Way
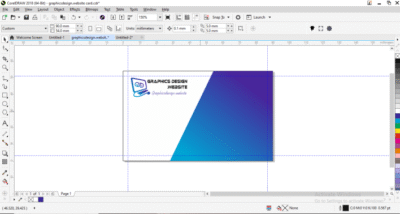
-
Import your logo (File ▸ Import).
-
If it’s a vector (AI/EPS/PDF/SVG), great. If it’s a bitmap, ensure 300 DPI and CMYK.
-
Position it inside the safe area (usually top-left or top-center).
-
Keep plenty of white space around it.
Step 6: Add the Text (Clean Hierarchy)
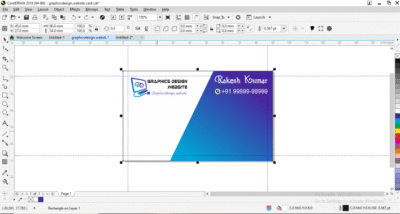
Add these fields (use what you need):
-
Name (11–12 pt, slightly heavier weight)
-
Title/Role (8–9 pt, lighter)
-
Company Name (if needed, 9–10 pt)
-
Phone |
-
WhatsApp | Email | Website (7.5–9 pt)
-
Address (optional; keep compact)]
- Quick align tips:
-
Select an object and press P to center to page.
-
Use Object ▸ Align and Distribute for consistent spacing.
-
Keep all text inside the safe area.
-
Step 7: Use Simple Icons (Optional but Neat)
-
Use small vector icons for phone, mail, web, location (keeps info scannable).
-
Convert icon strokes to objects if they’re too thin (avoid hairline).
-
Keep icon size consistent (e.g., 3–3.5 mm height).
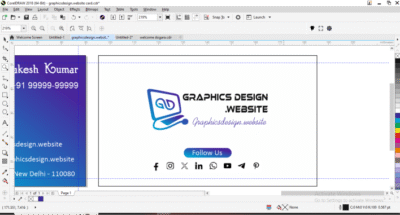
Step 8: Back Side of the Card (Optional)
-
Layout
-
▸ Insert Page After (Page 2).
-
Repeat the rectangles (bleed/trim/safe) on Page 2
-
(copy/paste from Page 1).
-
Add a bold logo, tagline, QR code, or a subtle pattern.
-
Keep it minimal—back sides look best when clean.
Download Readymade Templates of Visiting Cards online Click Here
Step 9: Color & Black Text Rules
-
For small black text, use K=100% (pure black) for crispness.
-
Use rich black (e.g., C60 M40 Y40 K100) only for large dark areas, not for small text.
-
Avoid 4-color black for tiny text to prevent mis-registration.
Step 10: Pre-Flight Check (Before Export)
-
Spelling ✔
-
Text inside safe area ✔
-
Background extends to bleed ✔
-
Minimum font size/line weights ✔
-
Convert text to curves (Ctrl + Q) in a copy of your file, so fonts don’t shift at the printer. (Keep an editable master with live text.)
Step 11: Export for Print (Best: PDF)

Option A: PDF (recommended)
-
File ▸ Publish to PDF (or File ▸ Export ▸ PDF).
-
Preset: PDF/X-1a or PDF for Prepress.
-
In Settings ▸ Prepress:
-
Bleed: 3 mm on all sides
-
Crop marks: On
-
Downsampling: 300 DPI for images
-
Colors: CMYK only
-
Option B: TIFF/JPEG (if your printer requests images)
-
Export CMYK, 300 DPI, include bleed manually (by exporting the bleed rectangle area).
Note: PNG is RGB and not ideal for press. Prefer PDF/TIFF/JPEG CMYK for printing.
Step 12: Share a Clear Print Note
When sending files to your printer, include:
-
“Visiting Card size: 90 × 54 mm (or your chosen size)”
-
“Bleed: 3 mm, Crop Marks: ON”
-
“Text converted to curves”
-
“CMYK PDF attached”
Layout Example (Copy & Tweak)
Front:
-
Top-left: Logo
-
Right: Name + Title
-
Bottom-left (or column): Phone | WhatsApp | Email | Web
-
Keep everything inside safe area, aligned to a clean grid.
Back:
-
Centered logo + tagline, or a QR code to your website.
Common Mistakes to Avoid
-
No bleed or crop marks (causes ugly white edges)
-
Fonts too small (<7 pt) or ultra-thin strokes
-
RGB images/colors (prints dull/shifted)
-
Busy backgrounds under small text
-
Too many fonts (keep it to 1–2)
FAQs
Order Best Quality Visiting Card Click Here
Q1. What size should I use for India?
A: 90 × 54 mm and 89 × 51 mm are both common. Confirm with your printer; this guide works for either.
Q2. Do I have to convert text to curves?
A: It’s safest. Convert only in a copy before export so you keep an editable master.
Q3. What resolution do I need?
A: 300 DPI for placed images at final print size.
Q4. Can I export PNG?
A: PNG is RGB; not ideal for commercial print. Use PDF (best) or TIFF/JPEG CMYK.
Q5. From where i can order visiting card online.
A: You can order onliner from Friends Print Art online or offline.
